
To the uninitiated, Kubernetes does a fairly simple thing: it provides the scaffolding to effortlessly run applications with very complex architectures. Rancher has built on top of this scaffolding, making it easy not only to deploy and manage Kubernetes clusters but also applications. With Kubernetes, a lot of established paradigms of software development are evolving, oftentimes forcing many structural changes for the organizations. Things that many IT and procurement departments started to take for granted with the adoption of Infrastructure as a Service (IaaS), like cost allocation, get a new meaning and new complexity with Kubernetes.
![]()
With the introduction of IaaS, IT departments started enabling faster turnaround for software deployments. Innovative solutions went from long cycles of drafting specifications to hardware sizing, procurements and deployments that would take months. Virtualization solutions from VMware to OpenStack allowed IT to almost decouple itself from the engineering: hardware selection and buying cycles got more predictable for IT while engineers gained agility and independence. Billing and chargebacks from this virtualized IT usage was not too complicated since applications on pure IaaS tend to be quite easily assigned quotas of storage, CPUs, memory and bandwidth.
Monitoring costs of Kubernetes adds an extra layer of complexity. For example, the container orchestration system is capable of automatically scaling the hardware requirements of an application based on demand. At the end of the month, it’s hard to know in a Kubernetes cluster which application has used more of the resources allocated to the cluster. Without a cost monitoring solution, along with a culture of awareness, it’s too easy to cause unwanted cost overruns.
Impact of Not Solving
Typically, Kubernetes is implemented so that multiple engineering teams are able to rapidly deploy applications in a shared environment. With its powerful provisioning and scheduling APIs, developers targeting a Kubernetes cluster have the power to obtain near infinite scale…until the cluster runs out of budget, that is. In shared environments, this power can easily lead to a sort of tragedy of the commons, applied to Kubernetes: when all application engineering teams overprovision resources to ensure their applications are performant without appreciating the full cost of these resources.
When every team overprovisions their pods/deployments/clusters independently, organizations waste their resources. Worse, everything from pods to applications become unstable, hurting the promise of Kubernetes in the first place. From our experience, teams typically waste over-allocating resources by 30% to 50%.
Kubecost’s Approach
The first step to developing a culture that avoids the tragedy of the commons is to deploy a tool like Kubecost to show inefficiencies. Teams will start becoming aware of simple issues like abandoned or orphaned cloud resources, e.g. old deployments or persistent volumes, and inefficiency clusters.
Kubecost allows you to see resources across all native Kubernetes concepts, so you can provide your teams with transparent, accurate cost and usage data. The initial breakdown of costs by namespace, deployment, and service can serve as a “showback” solution before implementing full chargeback.
How To Track Cost by Rancher Project
Rancher is a great help for developers new to Kubernetes. The visualizations in the Cluster Manager provide useful guidance to what’s happening behind the curtains. Being able to use kubectl or to deploy and troubleshoot workloads, and even login directly into pods from the browser is almost magical.
A simple approach to cost management in Rancher is to to set quotas within the context of Projects. It’s a simple start that doesn’t allow tracking details like how much resources are being consumed by each pod in a namespace. In cases where teams have namespaces for development, staging and production this is complicated even further.
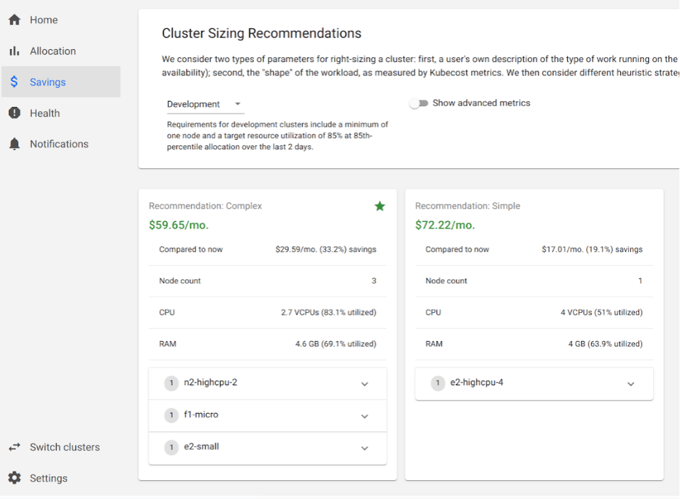
The open source Kubecost project can be easily installed in any Rancher cluster enabling cost monitoring and optimization at a granular level. It generates context-aware cluster sizing recommendations after analyzing Kubernetes metrics on historical workloads. Kubecost runs fully on-premise and doesn’t generate any egress traffic.
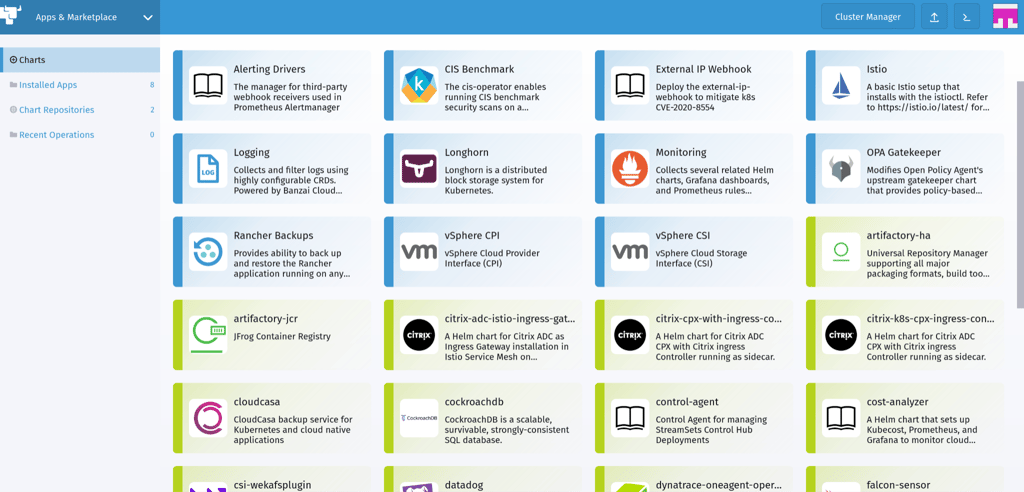
Kubecost can be installed directly from the Apps & Marketplace inside Rancher’s Cluster Explorer.
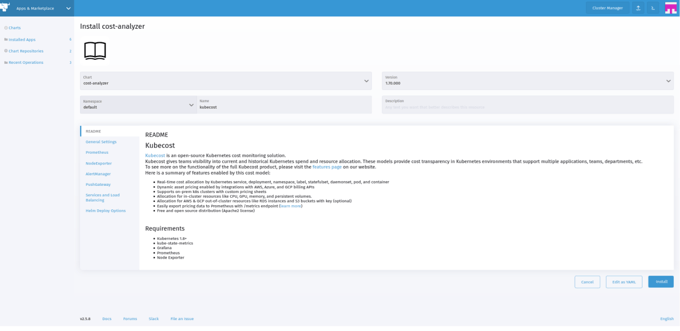
Pictured above: Configure and install Kubecost cost-analyzer Helm chart.
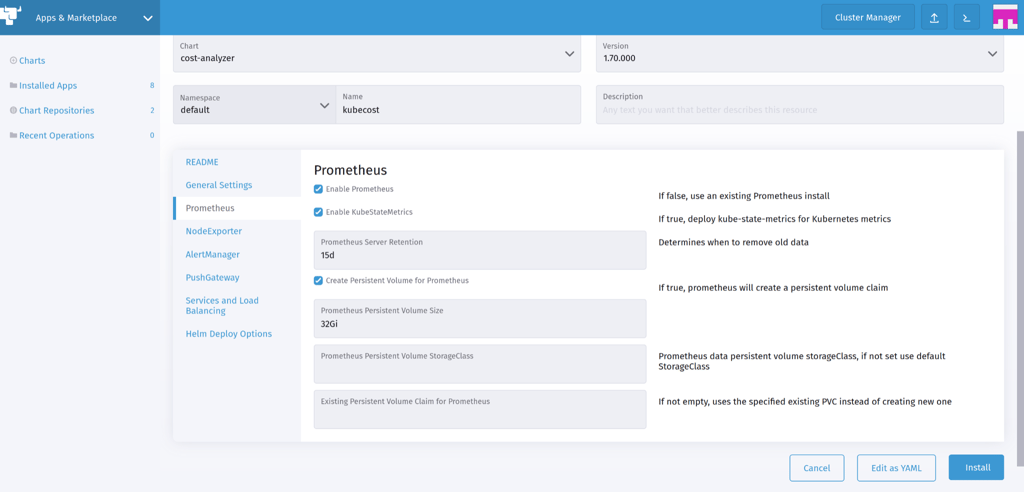
The chart is called cost-analyzer: once selected, the yaml file can be edited directly although some configuration options are available directly in the GUI. For example, you can disable installing Prometheus and re-use an existing installation.
Using the Rancher observability stack
Kubecost has the ability to integrate into an existing Prometheus stack. For example, teams running the Rancher-deployed node exporter, can leverage this existing DaemonSet by setting the following flags in a helm values file:
prometheus.nodeExporter.enabled=false
prometheus.serviceAccounts.nodeExporter.create=false
Note: This requires your existing node exporter endpoint to be visible from the namespace where Kubecost is installed.
Disable Prometheus to use an existing installation
Cost visibility & optimizations with Kubecost
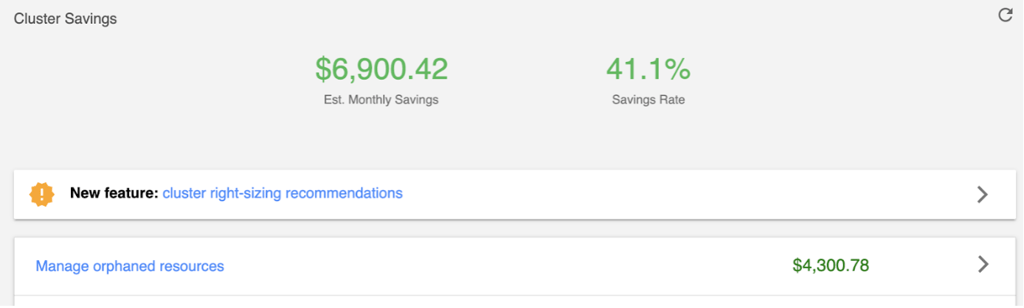
Once you have Kubecost running in your clusters, it will generate context-aware cluster sizing recommendations. Based on historical workloads and cloud billing data, the tool suggests opportunities to improve configurations based on context of the cluster. Recommendations change whether you’re using Kubernetes for development, testing or production.
Kubecost’s Support for Air-Gapped Installations
To allow cost monitoring in high-security, air-gapped environments, Kubecost images can be deployed from a locally hosted repository. Kubecost requires 3 images: FrontEnd, Server and CostModel and only five more optional. Prometheus and Grafana can be reused, when already available.
The prices for assets in your on-premise Kubernetes environment can be defined in a helm values file.
#  defaultModelPricing: # default monthly resource prices
#    CPU: 28.0
#    spotCPU: 4.86
#    RAM: 3.09
#    spotRAM: 0.65
#    GPU: 693.50
#    spotGPU: 225.0
#    storage: 0.04
#    zoneNetworkEgress: 0.01
#    regionNetworkEgress: 0.01
#    internetNetworkEgress: 0.12
#    enabled: true
Alternatively, they can be entered in the Kubecost Settings page. This allows users to directly supply the cost of a CPU/month, RAM Gb month, etc.
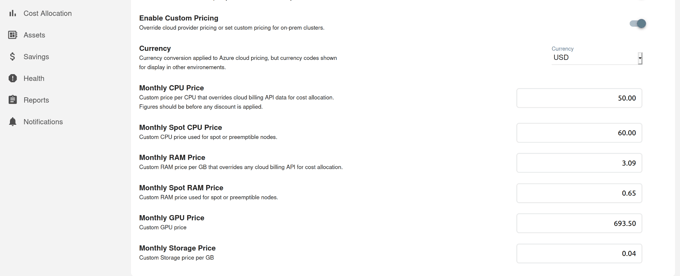
Pictured above: Configure custom pricing using Kubecost’s GUI.
A more advanced method allows you to each individual asset in the air-gapped environment to have a unique price. This leverages the Kubecost custom CSV pipeline which is available on enterprise plans.
Conclusions
Rancher and Kubecost are perfect companions for high-security installations. Rancher’s ease of use is matched by Kubecost’s added monitoring and cost optimization of the investment in private cloud infrastructure. Even in air-gapped environments, the combination provides the visibility required to justify spend and optimize workloads.
“This publication was prepared or accomplished by the author in a personal capacity. All opinions expressed by the author of this publication are solely their current opinions and do not reflect the opinions of Rancher Federal, Inc., respective parent companies, or affiliates with which the author is affiliated. The author's opinions are based upon information they consider reliable, but neither Rancher Federal, Inc., nor its affiliates, nor the companies with which the author is affiliated, warrant its completeness or accuracy, and it should not be relied upon as such.”